





Fixing a Shade Sail to a House Wall
securely into masonry and facade
The house wall is often the first fixing point for a shade sail. Whether it can hold the tension depends on the substrate: masonry and concrete can carry it, insulation and a gutter cannot. Here you can read how to fix a fixed, tensioned sail to the wall, how the rope tension system goes end-on onto the facade and what applies to an insulated wall.
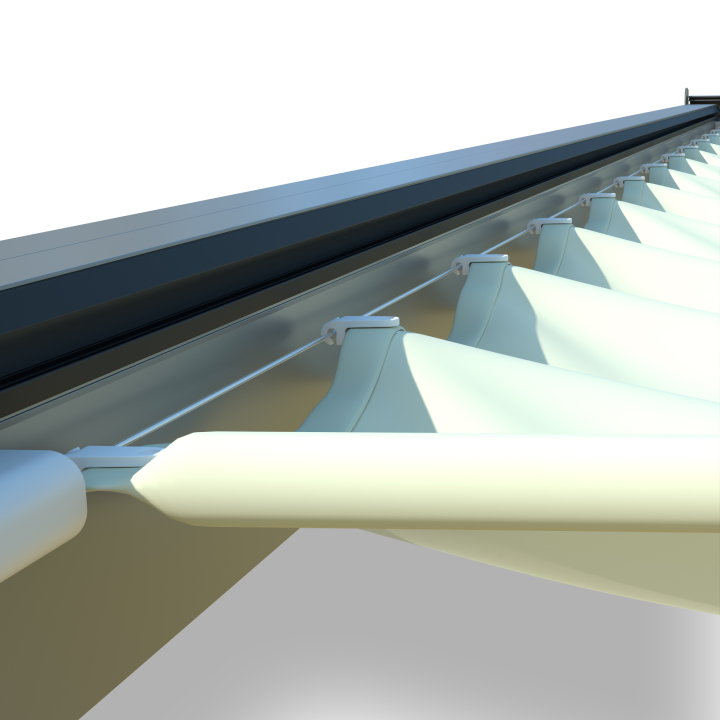
On the house wall, a shade sail is only as secure as the substrate behind it. Different rules apply to a fixed, tensioned sail and to a rope tension system.
- Fixed, tensioned sail: only set fixing points in masonry or concrete. A gutter and a trellis do not hold the tension.
- Plan for a slope: the lowest corner goes at the edge of the patio, away from the house wall. A height difference of 25 to 30 cm per metre across the diagonal means rain runs into the garden and not onto the facade.
- Rope tension system end-on at the facade: stainless steel tensioners with a facade plate, without a mounting bracket. The wall has to hold the screws permanently.
- Insulated facade (ETICS): standard plugs only hold in the insulation. ETICS plugs transfer the load into the load-bearing masonry.
- Plastic and composite facades cannot be assessed from a distance. In a rented flat, get your landlord's written consent beforehand.
- Agora is water-repellent: normal rain beads off, but in prolonged or heavy rain water gets through. If the sail is tensioned too flat, water pockets form.
Which Solution Suits Your Wall
When fixing a shade sail to a wall, you clarify two questions before drilling: what is the wall made of, and where are the other points? An overview of all the ways of fixing and the fittings at the corners is given in Fixing a shade sail.
Solid wall of masonry or concrete
The normal case. A fixed, tensioned sail hangs with one or two corners directly on the wall, and the other corners on posts, a tree or a second wall. A rope tension system goes end-on onto the facade.
Insulated facade
Here the plug decides. What to bear in mind with thermal insulation is explained below under insulated house wall.
Plastic or composite facade
Whether the material holds the screws permanently cannot be reliably assessed from a distance, not even with profiles that are steel-reinforced inside. Send us a photo, and we will advise on installation.
Roof or pergola with rafters
If there are rafters, fixing there is often easier than on the wall. How this works is explained under Fixing a shade sail to roof rafters.
On a balcony
On a balcony, the spans are short: house wall, railing posts, pergola beams. More on this, including solutions that do not touch the facade, under Fixing a shade sail to a balcony.
Patio without posts at the front
On the house wall, the long edge of a rectangle runs along the wall, and the front corners need posts. How to set the points on the patio is explained under Fixing a shade sail on a patio.
Fixing a Fixed Shade Sail to the Wall, Step by Step
Choose load-bearing points
On the house wall, only masonry or concrete; opposite, a post in a pad foundation or a sturdy tree trunk with a strap instead of a screw. A gutter and a trellis do not hold the tension.
Set the slope
The lowest corner belongs at the edge of the patio, away from the house wall. Allow for a height difference of 25 to 30 cm per metre across the diagonal.
Measure the distances
Between the sail corner and the fixing point sit the carabiner and turnbuckle. Add 30 to 50 cm per corner, so the distance between the points is greater than the sail.
Set the fixing points
Set the points on the wall and post so that the sail later tensions evenly across the diagonals. On an insulated facade, the load has to reach the load-bearing masonry.
Hook in the corners
Hook the carabiner and turnbuckle into the stainless steel rings at the corners. First hook in all the corners loosely, then tension.
Tension diagonally
Re-tension in turn, diagonally, until no creases remain. A taut sail does not flap and does not collect water.
Fixing a Rope Tension Shade Sail to the House
A rope tension shade sail runs on support ropes and can be pushed together. On the house wall, the tensioners sit end-on, that is, directly on the vertical surface. Tensioning a shade sail shows every step of the installation.
Stainless steel tensioners with facade plate
The tensioners go directly onto the wall with a facade plate, and a mounting bracket is not needed. This is the fixing we especially recommend for shade sails without a roof over them: the plates distribute the tension cleanly into the facade. Without a roof, the gathered sail has to be stored under cover in rain and bad weather. If you have no such space, take it down beforehand. It does not replace a roof, and without a roof you use it at your own risk.
A second load-bearing point opposite
The house wall carries the rope guides on the house side. On the garden side, you need a cross beam, rafters or a girder where the ropes end on the other side.
Long span without rafters
If there is no supporting structure over about 6 to 10 m, there is a free-hanging rope tension system with stainless steel wire rope and eye bolts in the masonry. This is a special solution that we design individually. It sags more and reacts more sensitively to wind.
Which rope
On the rope tension shade sail, polyester rope is the standard. We supply stainless steel rope only by arrangement, for example from a rope length of around 6.5 m.
Ropes first, then the sail
First fit and tension all the ropes firmly, then hang the sail or panel. The other way round, the ropes can hardly be pulled taut any more.
What is included
The rope tension shade sail and rope tension awning come with the complete installation accessories. On the rope tension shade sail, this includes rope tensioners, polyester rope as the standard rope, slide brakes and the operating pole, and the runner hooks are sent on afterwards. Stainless steel rope is only available by arrangement, and it is not a missing part.
Rope tension awning end-on
On the rope tension awning, the panel can be made tauter at the facade. The fabric bundle then hangs down about 21 to 23 cm instead of 30 to 35 cm. If there is a masonry ledge below the fixing, the bundle has to be lifted over it when retracting.
Fixing a Shade Sail to an Insulated House Wall
On a facade with an external thermal insulation composite system (ETICS), normal plugs only hold in the insulation layer. There they do not reach permanent tensile strength, and a shade sail pulls constantly.
For end-on installation on an insulated wall, we use special ETICS plugs. They transfer the load through the insulation layer into the load-bearing masonry. This is also the right solution if an awning may no longer be fitted to your facade because of the insulation.
With plastic or composite facades, we cannot check the load capacity from a distance. You confirm to us in writing that fixing to the surface is possible.
Before any drilling into the facade, get your landlord's written consent. If an intervention is not allowed, the solution without drilling helps on a balcony.
If it is unclear on a rope tension awning whether the fixing will hold, we can make a single panel first on request. You install it at your own responsibility. If the construction holds, we make the remaining panels afterwards.
Common Mistakes and What Matters After Installation
A gutter and sheet metal do not carry the tension of a sail. Which alternatives exist on the roof is explained under Fixing a shade sail to a gutter.
If the lowest corner is at the wall, the rainwater runs onto the facade. Place it at the edge of the patio.
If you order the sail as large as the distance between the points, there is no room for the carabiner and turnbuckle. Deduct 30 to 50 cm per corner.
On the rope tension system, every missing rope guide shows up as sag. Use all the guides.
You take a fixed, tensioned sail down when a storm is forecast. Rope tension systems are pure sun protection: in rain, strong wind or storms, you retract them and park the fabric bundle under cover. More under Shade sails in wind.
Take the sail down in autumn, clean it, let it dry and store it dry and ventilated, not on bare concrete. What applies to rain and frost is explained under Waterproofing a shade sail and winterising it.
The Right Sail for Your Wall
A sail that fits your points is the easiest to install. We sew to your measurements in Westoverledingen. You can find all further topics in the Shade Sail Guide.
Shade sail with three or four corners
Triangle, square, rectangle or trapezium, in fixed sizes or made to measure. On a house wall, 3 x 6 m, 4 x 6 m or 5 x 6 m are the usual sizes: Made-to-measure shade sails.
Rope tension shade sail
Sliding on support ropes, with complete installation accessories: Made-to-measure rope tension shade sail.
Rope tension awning
In panels under a pergola or patio roof, on the wall also end-on: Made-to-measure rope tension awning.
Frequently Asked Questions
Sources
Last reviewed: 22.10.2026 · Reviewer: Germes-Team
Will Your Wall Hold the Sail?
Send us a photo of the wall and the distances between your fixing points. We will tell you which sail suits and how it goes onto the facade securely.