





Attaching a privacy screen to a balcony railing
step by step without drilling
The easiest way to attach a privacy screen to a balcony railing is with a balcony screen with eyelets: cable ties or cord through the eyelets, around the railing bar, done. You do not need a drill for this, and you can take the screen down again for the winter. Here you can read what to check before installation, which tools you need and how to fit the screen taut in five steps.

The balcony screen is held by eyelets in the hem. To fix a balcony privacy screen, cable ties or cord are enough, and the balcony stays undamaged.
- Eyelets: the hem all the way round holds stainless steel eyelets with an inner diameter of about 1.1 cm, roughly every 20 cm. They sit at the top and bottom and, if needed, at the sides too.
- Fixing: pass cable ties or matching-colour cord through each eyelet and around the handrail or railing bar. Corners first, then the eyelets in between.
- No drilling: the screen is held only on the existing railing. You cut cable ties open to take it down, and cord simply unties.
- Check first: if you rent, ask the landlord, ideally in writing. Magnets alone do not reliably hold a tensioned screen.
What to check and clarify beforehand
Before you put up a balcony privacy screen, it is worth a quick look at the tenancy agreement, the railing and any gate. That way the screen will sit securely later and you avoid trouble.
Ask the landlord
If you rent, ask the landlord before any fixing to the façade or railing, ideally in writing. This also applies to a screen that is held only with cable ties.
Local building authority if in doubt
You can find out whether a permit is needed from your local building authority.
No risk of falling
The balcony railing must be firmly fixed and sturdy. Work in a way that leaves no risk of falling during installation, and do not lean far over the parapet on upper floors.
No sharp edges
Check the railing for sharp edges, burrs or protruding screws. They could chafe the fabric over time.
Measure the handrail
The cable ties supplied with the balcony screen fit a diameter of at most 76 mm. If your handrail is thicker, use cord or fix the screen to the bars below it.
Gate and several bays
If the railing has a gate, hinges or a latch, the screen gets matching cut-outs. Give us the measurements of the obstacles for this. With several bays, each bay gets its own screen, and the balcony edging ideas show how to divide them up.
What you need for installation
You need few tools to fix a balcony privacy screen. The screen arrives hemmed, with punched eyelets.
In the package
If you order the balcony screen with fixing material, cable ties or cord in your chosen colour are included. The cord is generously sized, and you cut it to length yourself.
Side cutters
For cleanly trimming the protruding ends of the cable ties, as close to the fastener as possible.
Scissors
For cutting the cord to length, if you fix the balcony screen with cord instead of cable ties.
A second person
With long balcony screens, a second person holds the screen while you fix the first eyelets.
How to fix the balcony screen in five steps
Prepare the railing
Clear flower boxes and loose items from the railing. Check it for sharp edges and that it is firmly fixed.
Position the screen
Place the screen on the side you want, with the top hem straight along the handrail. The screen is slightly smaller than the frame so that it can be tensioned taut between the fixing points.
Fix the corners
First fix the four corner eyelets, top and bottom. Pass the cable tie through the eyelet and around the handrail or railing bar and pull it tight.
Fix the eyelets in between
Then come the eyelets in between, alternating top and bottom, and the side ones last. Pull evenly so that the screen sits taut without overloading the eyelets.
Final check
Check that every eyelet is secure and the screen hangs without wrinkles. Trim the cable tie ends with the side cutters.
Fitting the balcony screen inside or outside the railing
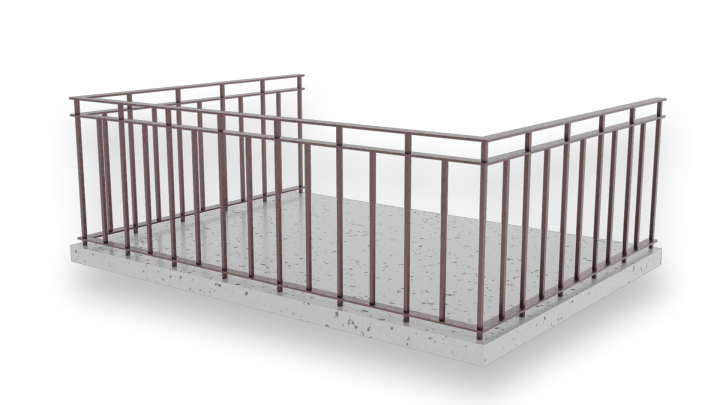
You can fit the screen inside or outside the railing, and the eyelets and fixing are the same. Safety during installation and the look of the façade decide. If you rent, agree with the landlord which side they prefer.
- Inside: you work from the balcony and do not have to lean over the parapet. This is the safe choice on upper floors. From inside, you see the railing bars in front of the screen.
- Outside: from the street, the surface looks calm because the bars disappear behind the screen. Only fit it on the outside if you can reach the eyelets safely, for example on the ground floor.
- Tension: the same order applies on both sides. Corners first, then the eyelets in between, evenly and without wrinkles.
Attaching a privacy screen without drilling - what holds
A balcony screen needs no drill hole. It is held by the eyelets on the railing, which stays undamaged. That is why you can fix a balcony privacy screen even if you rent, once the landlord has agreed.
Eyelets in the hem
The hem runs all the way round, is 3.5 cm wide and has three layers. It holds stainless steel eyelets with an 11 mm inner diameter, evenly spaced about every 20 cm. If you need more eyelets or a different spacing, note this when you order.
Cable ties or cord
Cable ties sit firmly and look tidy. Cord is easier to untie when taking the screen down. How to pass the cord through the eyelets and retension it is explained at Fixing balcony screening.
Magnets do not hold a screen
Magnets are designed to join two curtain panels in the middle. They do not reliably hold a screen under tension, and for that you also need steel as a counterpart. Sewn-in magnets are only available as a special request and without a guarantee of secure hold.
Take down seasonally
You cut cable ties open and untie cord. In winter, take the screen down and store it dry. What applies in strong wind is covered at Windbreak ideas for the patio.
Shade sail and pergola
A shade sail gives shade from above and is fixed differently, see Attaching a shade sail on a balcony. For sun protection with clamps or tension rods, read Pergola on a balcony without drilling.
Not a substitute for a roof
A balcony screen is privacy, sun and wind protection at the railing. Textile privacy screening is not a storm or rain roof.
Balcony screen and curtain for your balcony
We sew the balcony screen to your measurements in Westoverledingen, Made in Germany. You choose the length, height, fabric and fixing material at made-to-measure balcony screen. That page also explains how to care for the screen.
Measuring correctly
Measure the width and height for each bay between the places where cable ties or cord grip. At a corner, choose one screen per side or one long screen around the corner. Exactly how to measure and what to deduct is explained at Making a balcony privacy screen yourself.
Four fabrics to choose from
The balcony screen comes in four fabrics, plain or striped. Which suits your balcony is shown in the balcony privacy screen ideas. You can see how the colours look in real life with free fabric samples.
Curtain instead of a screen
A curtain can be opened and closed. It hangs from wire rope or a track, not directly on the railing. More on this at made-to-measure balcony curtain and outdoor curtains.
Patio without a railing
If there is no railing, the privacy screen needs other fixing points. What holds then is explained at Attaching a privacy screen on the patio.
Send a photo
Not sure how to fix the privacy screen to the railing? Send us a photo and the measurements via the service centre. You will find all topics around the balcony in the balcony privacy screen guide.
Frequently Asked Questions
Sources
Last reviewed: 09.11.2026 · Reviewer: Germes-Team
Questions about fixing to your railing?
Send us a photo of your railing and the measurements. We will tell you how the balcony screen holds best and whether cut-outs for a gate or latch are needed.