





Installing your cable awning in
3 options
This guide shows you how to install your cable tension awning yourself - in three options, depending on your roof structure. Whether you have a fascia board, wooden or metal rafters, or prefer a premium stainless steel solution: here you will find the right steps with every part and every move explained.
Cable tension awning made to measure

This installation guide applies to our made to measure cable tension awning. Every shading panel is sewn to your measurements and delivered complete with all mounting parts.
- Premium fabrics: Agora Liso, Dralon or Polysun
- Complete delivery: polyester rope, glides, stopper, operating rod
- Made to your measurements - Made in Germany
Which mounting option suits you?
Three mounting options are available - it depends on your roof structure. Check whether there is a fascia board at the front and at the back, whether you fix directly to the side of the rafters, or whether you prefer a compact stainless steel solution.
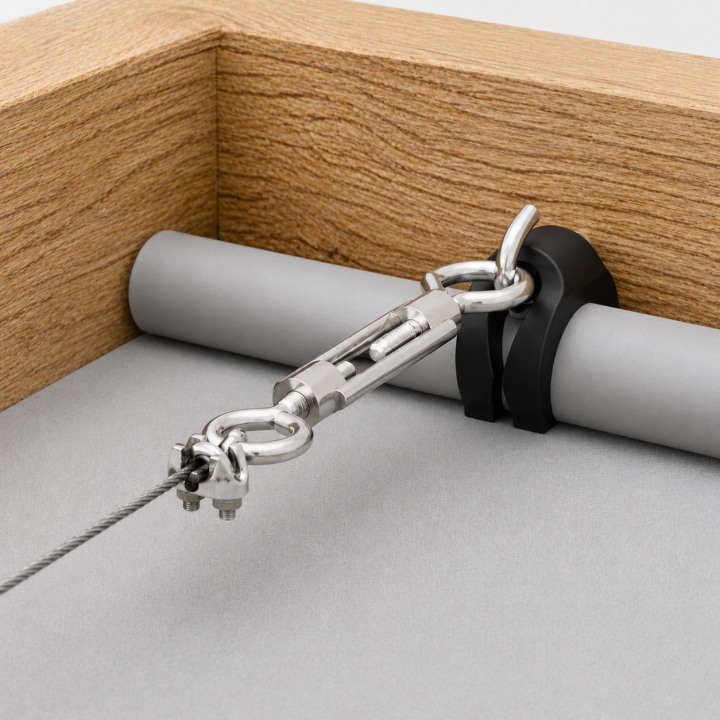
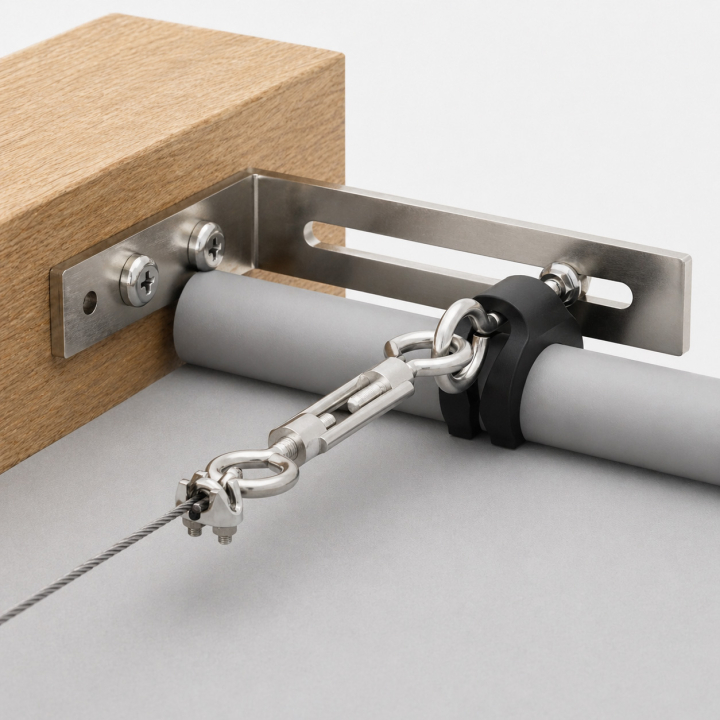

What you always need
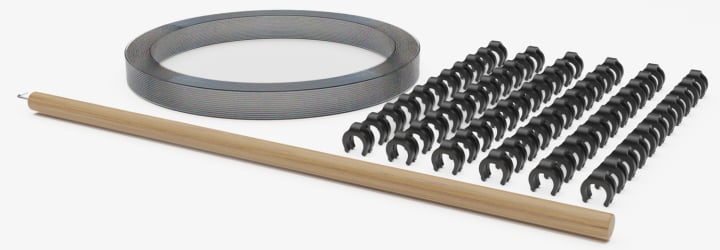
You need these parts and these tools for every one of the three mounting options. The parts specific to each option are listed directly in the matching section. Polyester rope with a diameter of 2.2 mm and 1,800 N tensile load is the carrying rope for all shading panels. Glides hang the panels on the rope and keep them moving with low friction. Stoppers fix the last panel on the rope with an Allen screw.
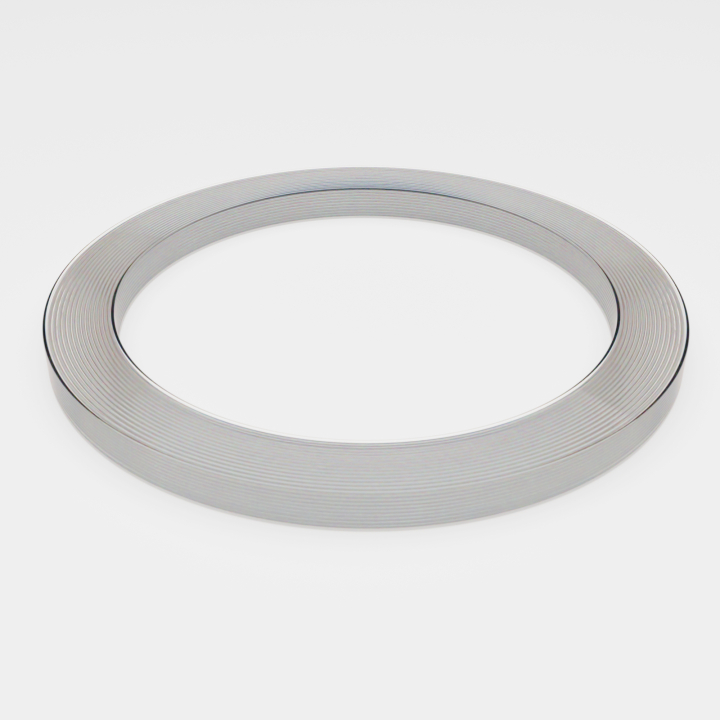
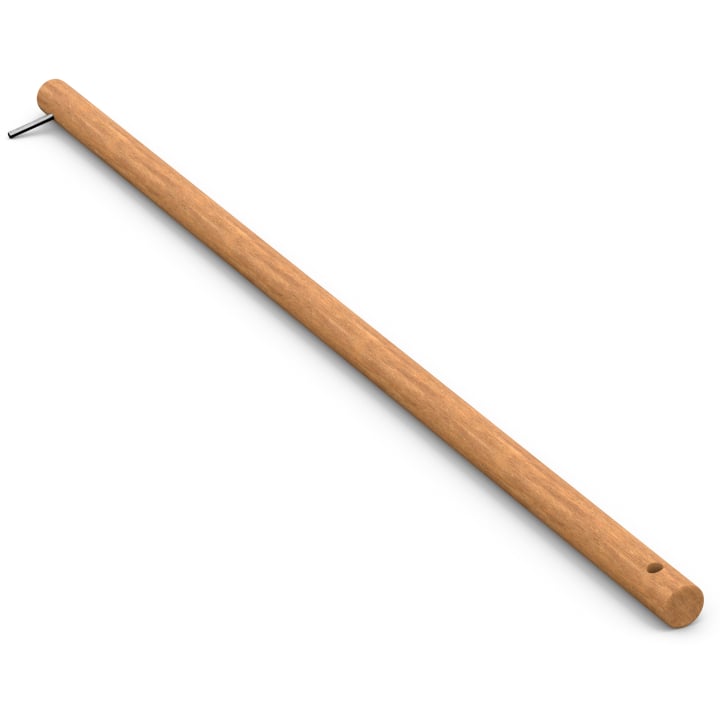
- Polyester rope 2.2 mm diameter, 1,800 N tensile load - two ropes per panel (one per long side)
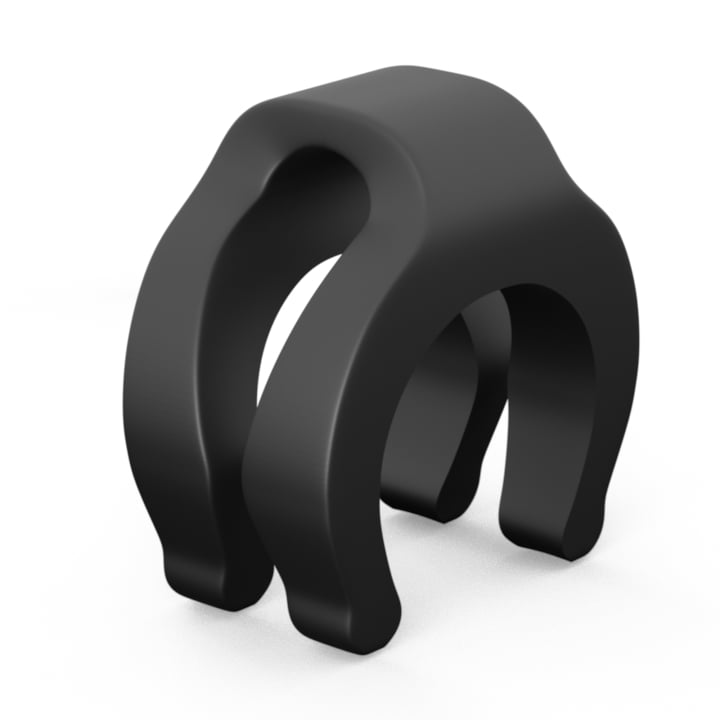
- Glides (plastic) - the number depends on how many panel sections you have
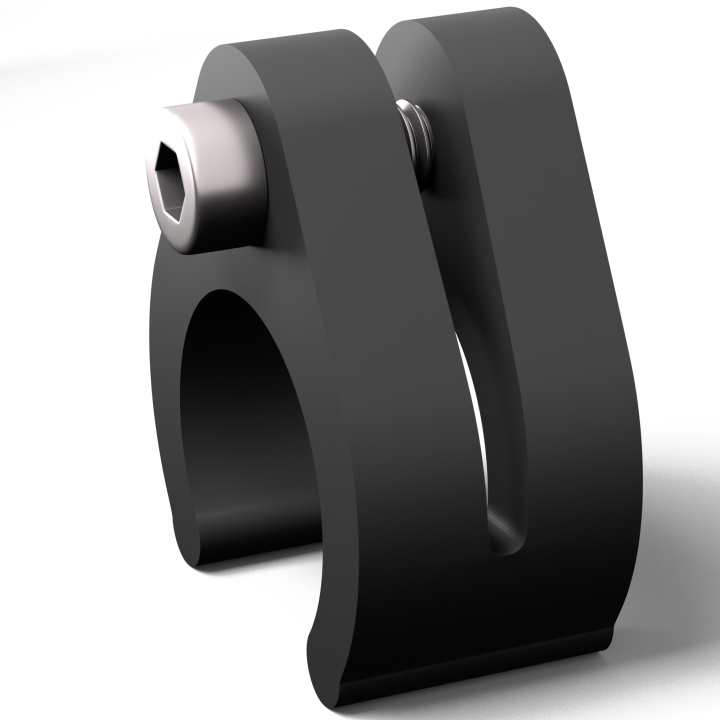
- Stopper - one per shading panel, on the last tube
- Allen key (for fixing the stopper)
- Drill (for metal or aluminium rafters: a 4.5 mm pilot hole is mandatory)
- Screwdriver or cordless screwdriver
- Pliers (optional, to crimp the rope end)
- Cable ties (optional, for a steeper roof slope)
Fixing to the fascia board (facade mounting)
When does this fit? When your roof structure has a fascia board (a front cross beam) at the front and at the back. This is the classic solution with screw hooks and the standard cable tensioner. Per shading panel you need at least two cable tensioner sets (one for the left side, one for the right side).
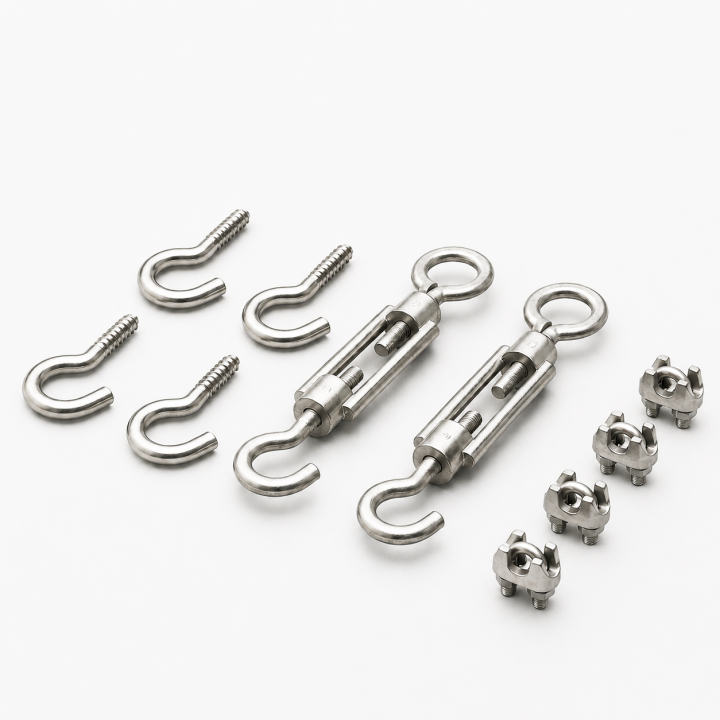
What you need per shading panel
Per shading panel you need the following - in addition to the general parts from the section above:
- 4 screw hooks (2 at the front and 2 at the back, into the fascia board)
- 2 cable tensioners (standard tensioner with screw hook and screw eye - turning it tensions the rope)
- 4 rope clamps (2 per rope, they hold the rope loops)
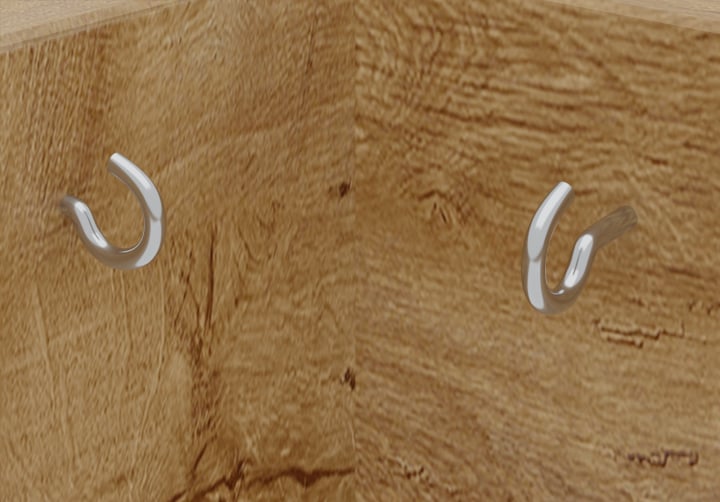
Screw the hooks into the fascia board
Screw 2 hooks into the fascia board at the front and 2 at the back. Make sure the pairs of hooks sit at the same distance on both sides - this is what makes the ropes run parallel later. Hang one glide onto each of the rear screw hooks right away.
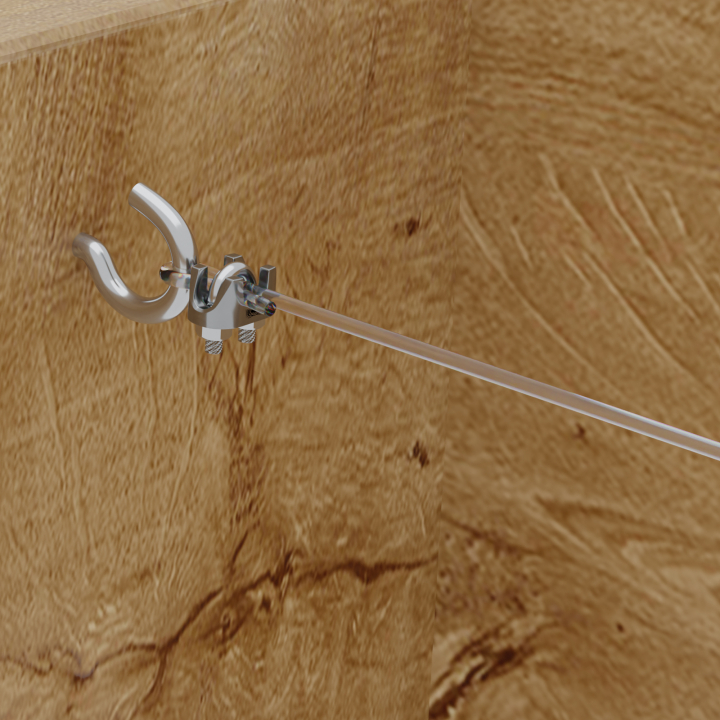
Fix the front end of the rope
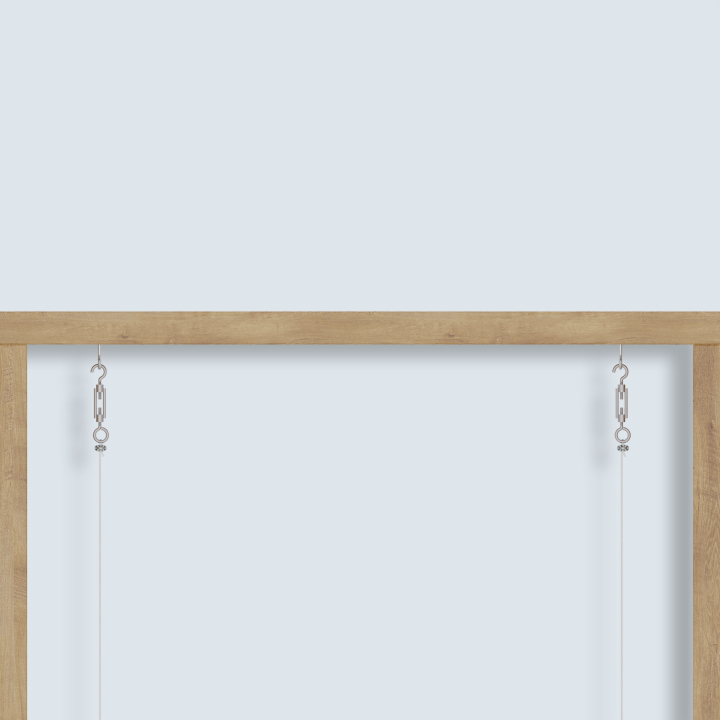
Make a loop at one end of the rope and clamp it with a rope clamp. Hook the loop into the front screw hook. This is the fixed end of the rope.
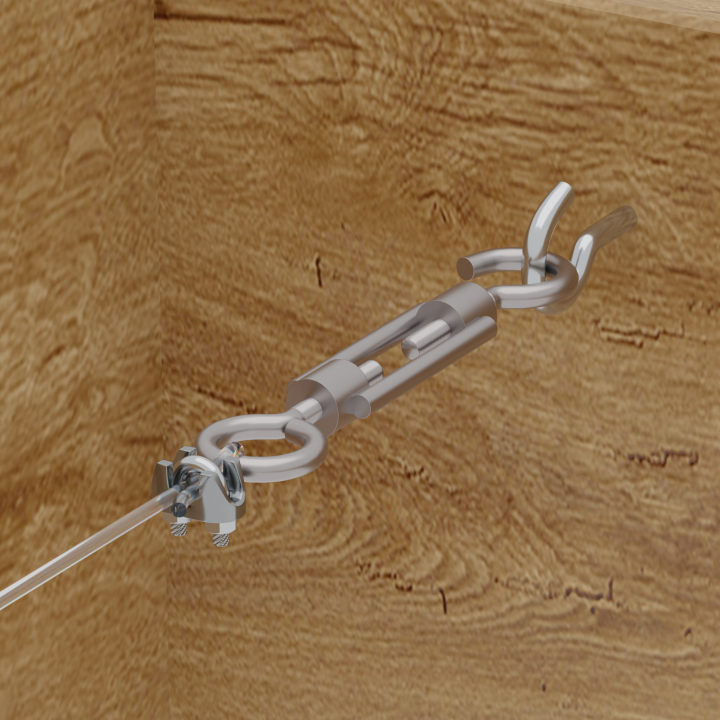
Connect the rear rope end to the cable tensioner
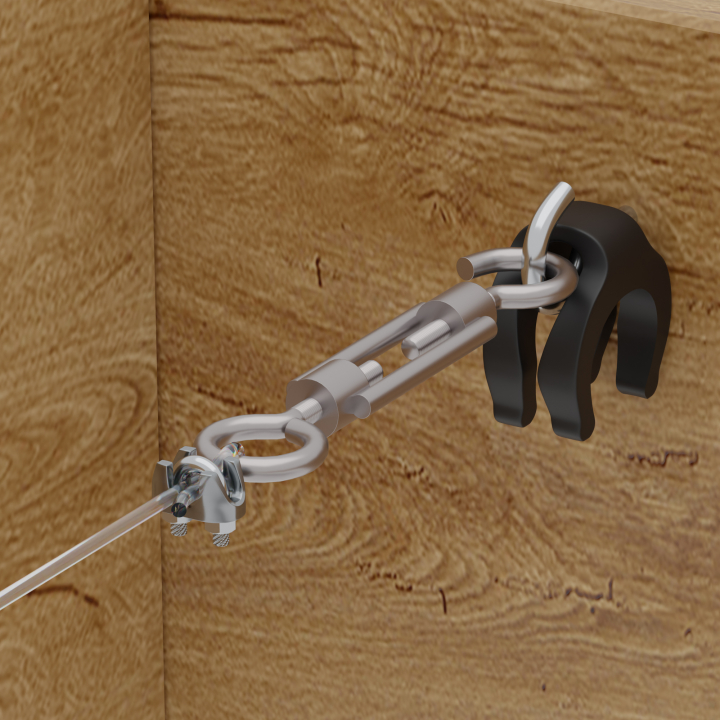
Lay the other end of the rope as a loop around the screw eye of the cable tensioner and clamp it with a rope clamp. Important: the tensioner has to be fully unscrewed beforehand (full length), so there is enough travel left for tensioning. Do not leave the rope too long. Then hook the screw hook of the tensioner into the rear screw hook.
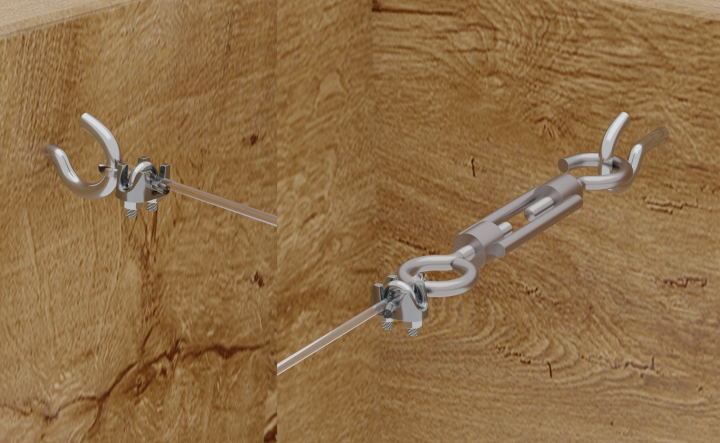
Tension the rope
Turn the screw connection of the tensioner until the rope is taut. Do not over-tension it - the rope should be straight and firm, but not under extreme tensile load.
Repeat on the opposite side
Carry out steps 1 to 4 on the opposite rafter. Check that both ropes run parallel - this is the condition for the shading panels to glide cleanly later on.
Hang the glides and mount the panels
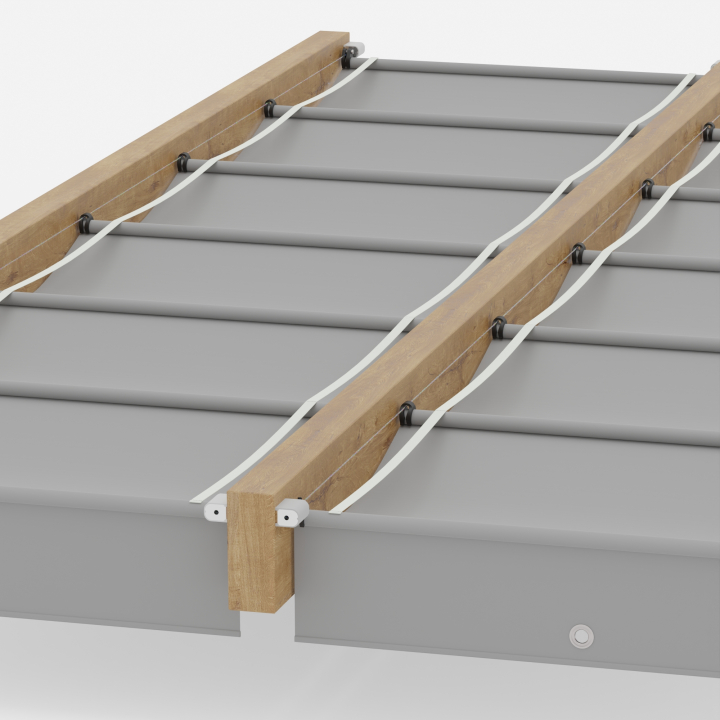
Thread the required number of glides onto both ropes. Place the last glide directly on the screw hook on the tensioner side - this fixes the last aluminum tube of the shading panel. Then clip the aluminum tubes of the fabric panels into the glides and stoppers. The tubes sit tight - that is intended (more on this in the tips section further down).
Angle cable tensioner between the rafters
When does this fit? When your roof structure has no fascia board and you fix directly to the side of the wooden or metal rafters. The galvanised iron brackets are mounted on the side of both rafter ends and carry the screw hooks. Per shading panel you need two cable tensioner sets.
What you need per shading panel
Per shading panel you need the following - in addition to the general parts from the section above:
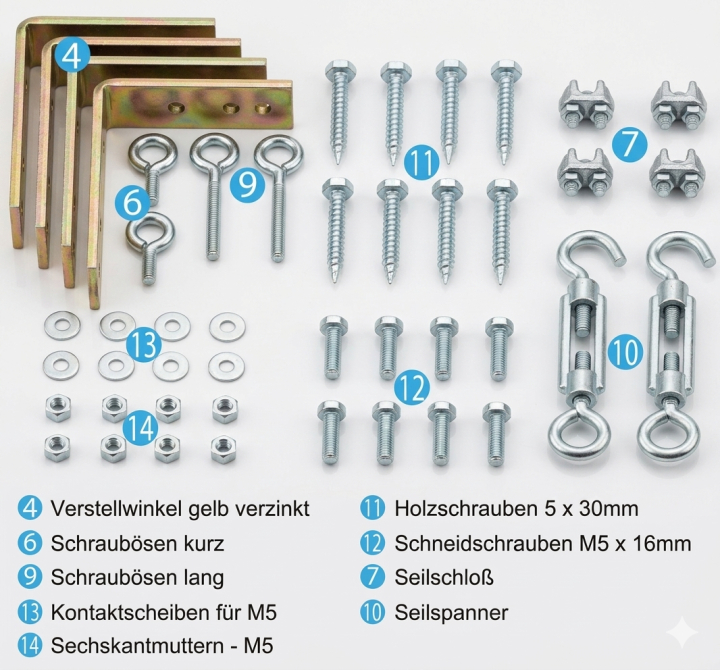
- 4 iron brackets (galvanised, 2 at the front and 2 at the back)
- 2 short screw hooks (on the front brackets)
- 2 long screw hooks (on the rear brackets)
- 8 contact washers M5
- 8 hexagon nuts M5
- Wood screws 5x30 mm (wooden rafters) or self-tapping screws M5x16 mm (aluminium and metal rafters, 4.5 mm pilot hole mandatory)
- 2 cable tensioners with screw hook and screw eye
- 4 rope clamps
Mount the iron brackets to the side of the rafters
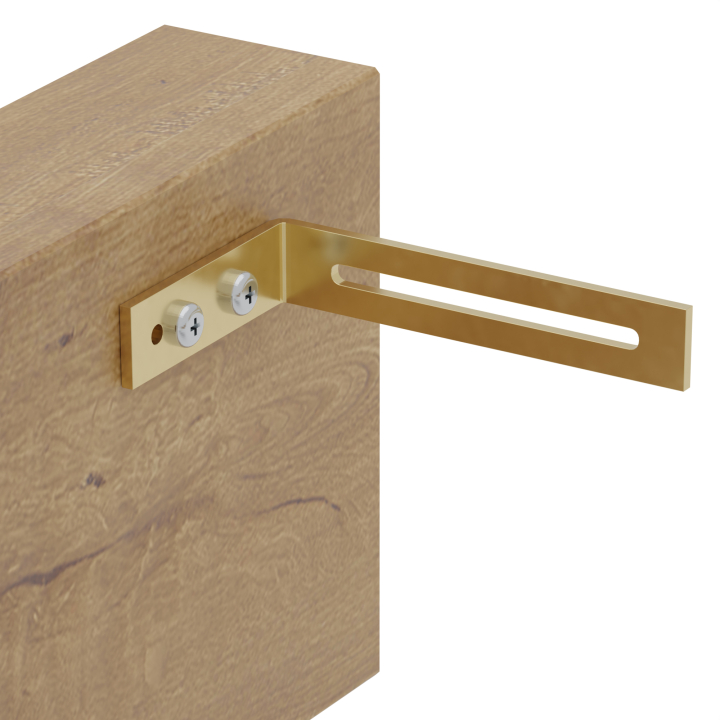
Fix 2 iron brackets to the side of each rafter end - one at the front and one at the back. On wooden rafters use wood screws 5x30 mm. On aluminium or metal rafters use self-tapping screws M5x16 mm - here a 4.5 mm pilot hole is mandatory, otherwise the material tears.
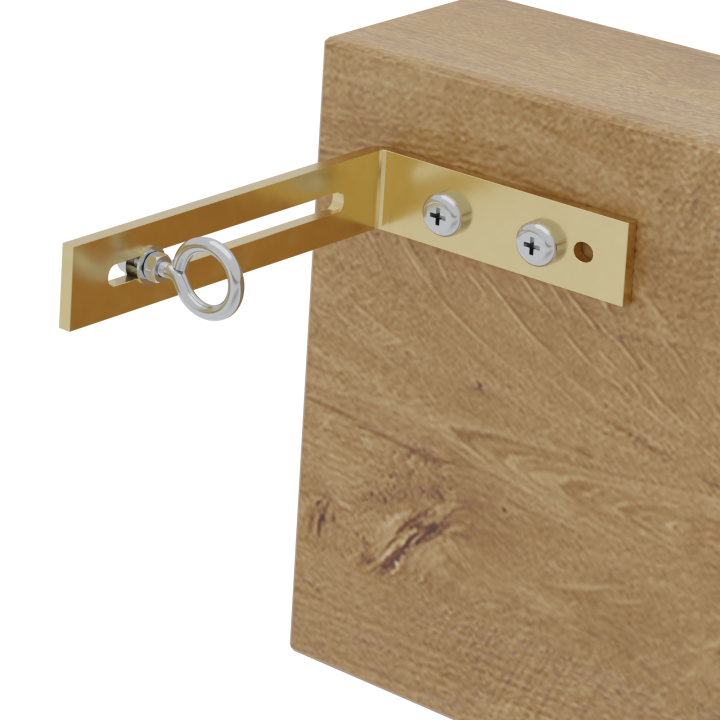
Mount the front screw hooks (short)
Mount the short screw hooks with contact washers and hexagon nuts on the front iron brackets. The contact washers keep the nuts from working loose through vibration.
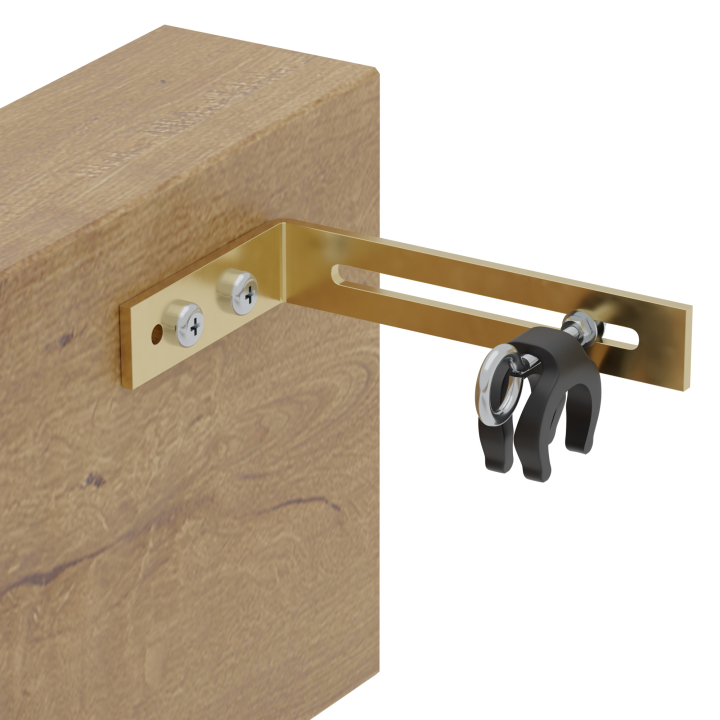
Mount the rear screw hooks (long) and add the glides
Mount the long screw hooks with contact washers and hexagon nuts on the rear iron brackets. Slide one glide onto the threaded rod of each rear screw hook right away - the glide is then already in the right position for hanging the panel.
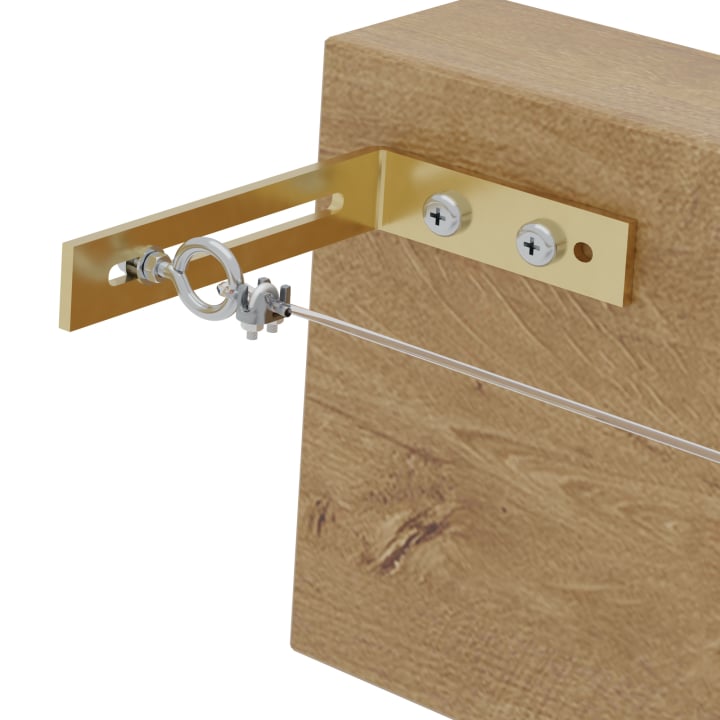
Fix the front end of the rope
Make a loop at the end of the rope and clamp it with a rope clamp. Hook the loop into the front screw eye. This is the fixed end of the rope.
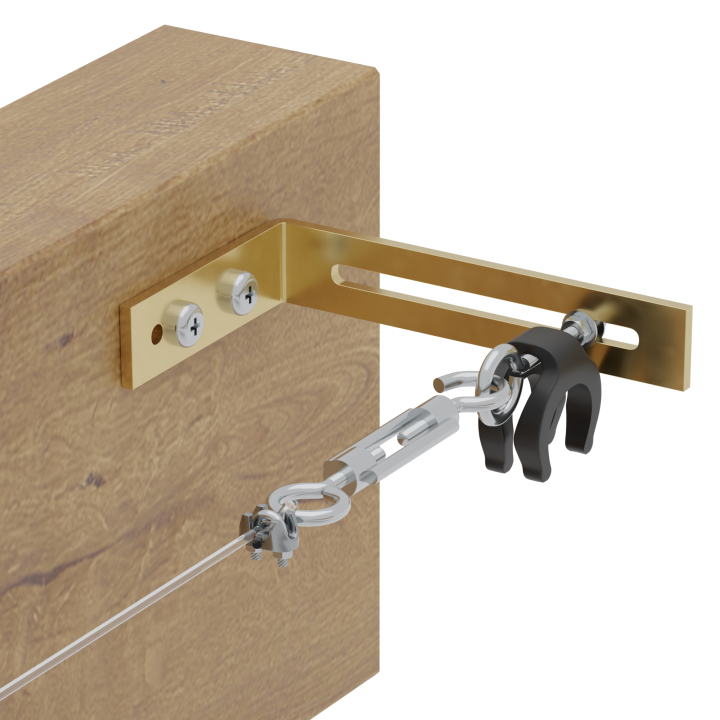
Connect the rear rope end to the tensioner and tension it
Lay the other end of the rope as a loop around the screw eye of the cable tensioner and clamp it with a rope clamp. The tensioner has to be fully unscrewed. Hook the screw hook of the tensioner into the screw hook on the rear iron bracket. Then screw the tensioner closed until the rope sits taut.
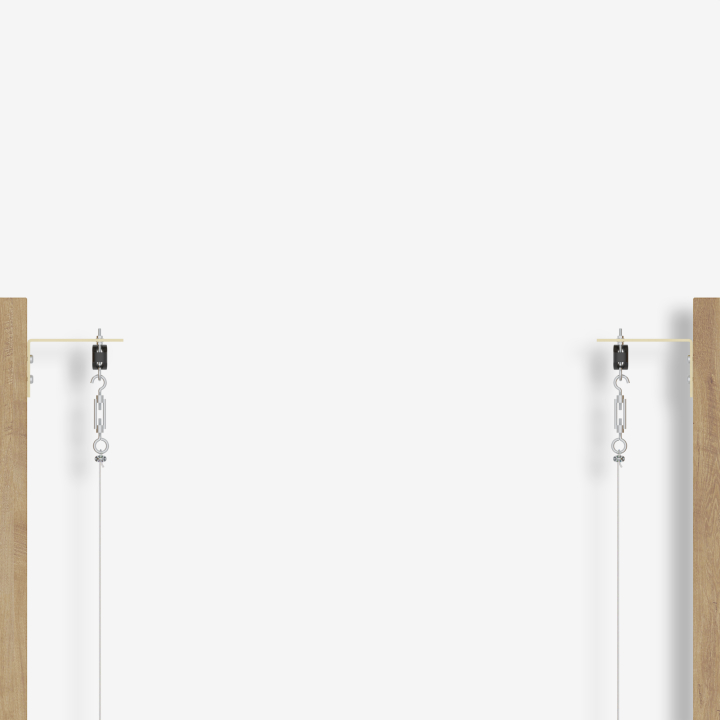
Repeat on the opposite side
Carry out steps 1 to 5 on the opposite rafter. Check that both ropes run parallel.
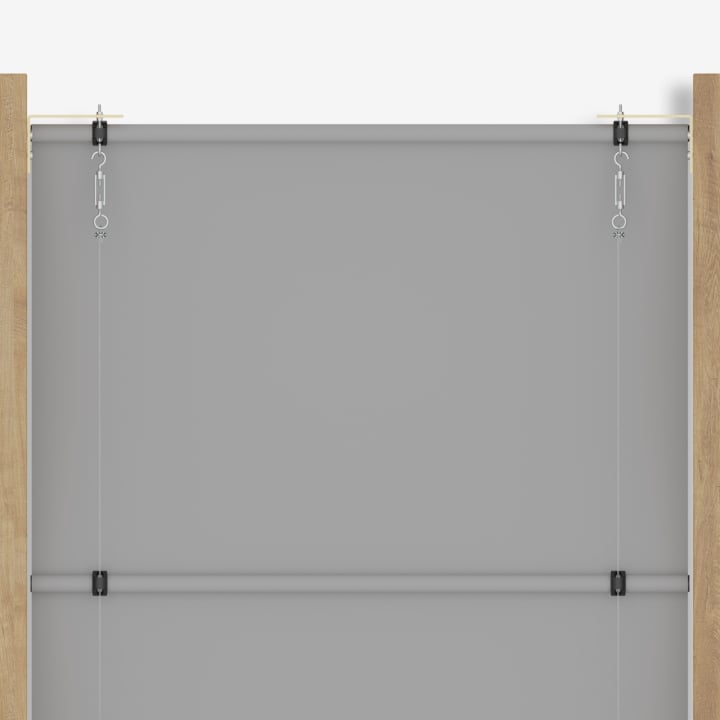
Hang the glides and mount the panels
Thread the required number of glides onto both ropes. Fix the stopper to the last aluminum tube. Clip the aluminum tubes into the glides and stoppers.
Stainless steel cable tensioner - between or beneath the rafters
When does this fit? This option suits a clean and compact stainless steel solution. You can mount the tensioner to the side of the rafters (between the rafters) or underneath the rafter (beneath the rafters) - depending on your roof structure and your preference. For mounting from below we recommend a distance of 3 cm to the roof. Per shading panel you need 18 parts (2 tensioner sets with 9 parts each).
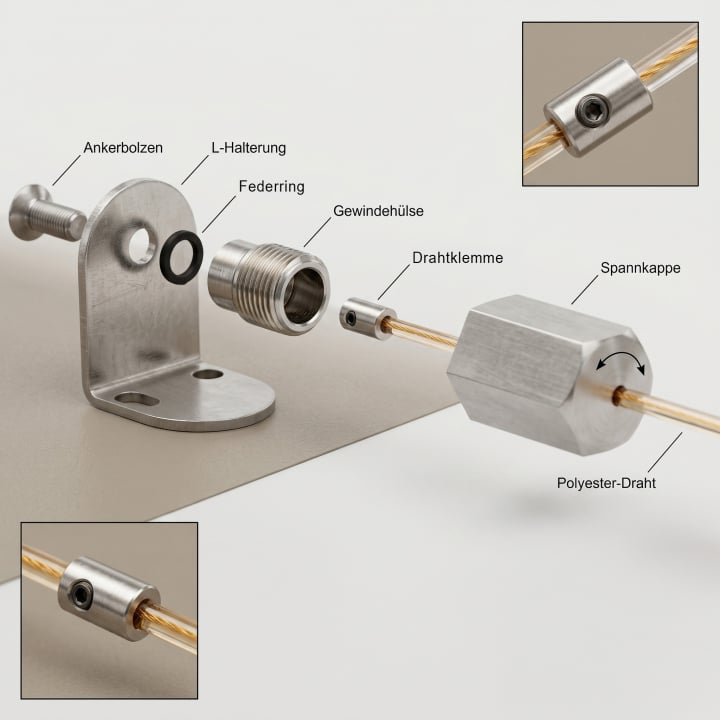
What you need per tensioner (8 parts, 2 sets per panel)
Each set consists of these parts (per shading panel you need 2 sets - one for each rafter side):
- 1 mounting bracket (stainless steel, with a hole for the threaded sleeve)
- 2 wood screws per bracket
- 1 countersunk screw
- 1 spring washer
- 1 threaded sleeve (screwed onto the countersunk screw)
- 1 stop element (plastic, the rope is fed through it)
- 2 grub screws (they clamp the rope inside the stop element)
- 1 tensioning element (screwed onto the threaded sleeve)
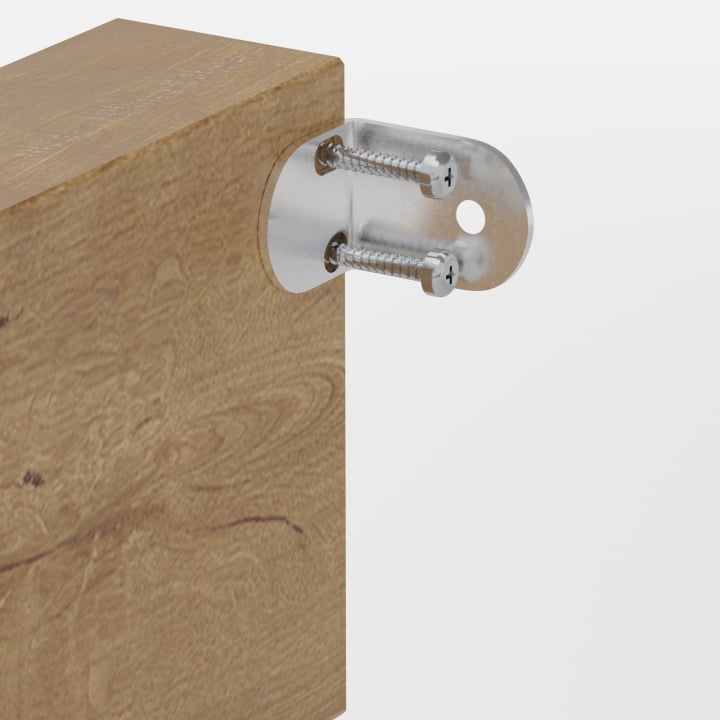
Attach the mounting bracket
Choose the mounting position: to the side of the rafter ends (between the rafters) or underneath the rafter (beneath the rafters). For mounting from below: recommended distance to the roof 3 cm. Fix the mounting bracket with 2 wood screws. On aluminium or metal rafters a 4.5 mm pilot hole is mandatory.
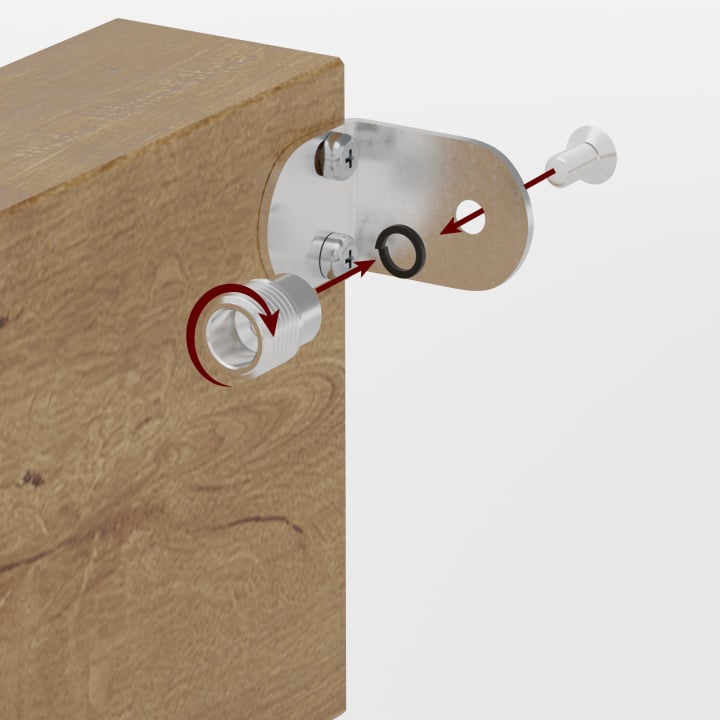
Assemble countersunk screw, spring washer and threaded sleeve
Put the spring washer onto the countersunk screw. Screw the threaded sleeve onto the countersunk screw. Mount this assembly on the bracket by guiding the countersunk screw through the hole in the bracket.
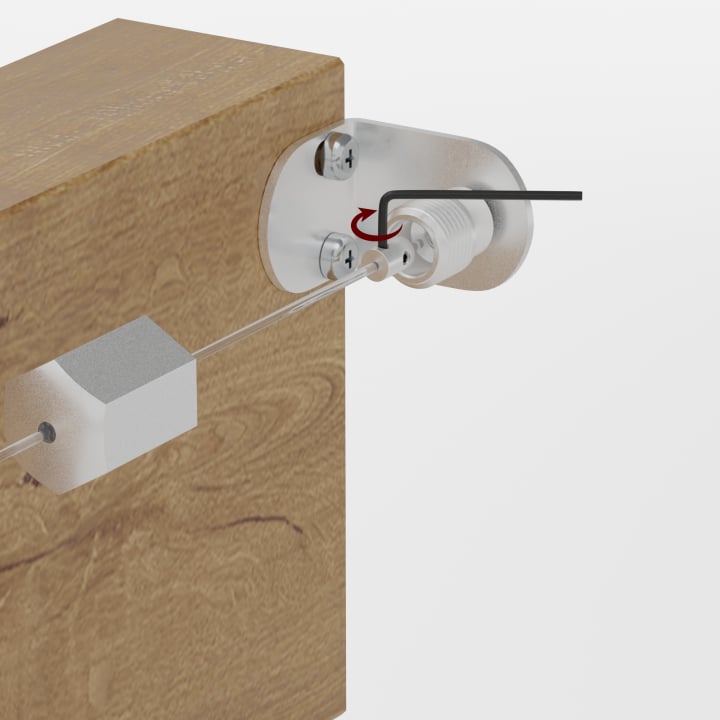
Clamp the rope in the stop element
Feed the rope through the stop element. Tighten both grub screws - they are offset so the rope is held securely and does not slip under load.
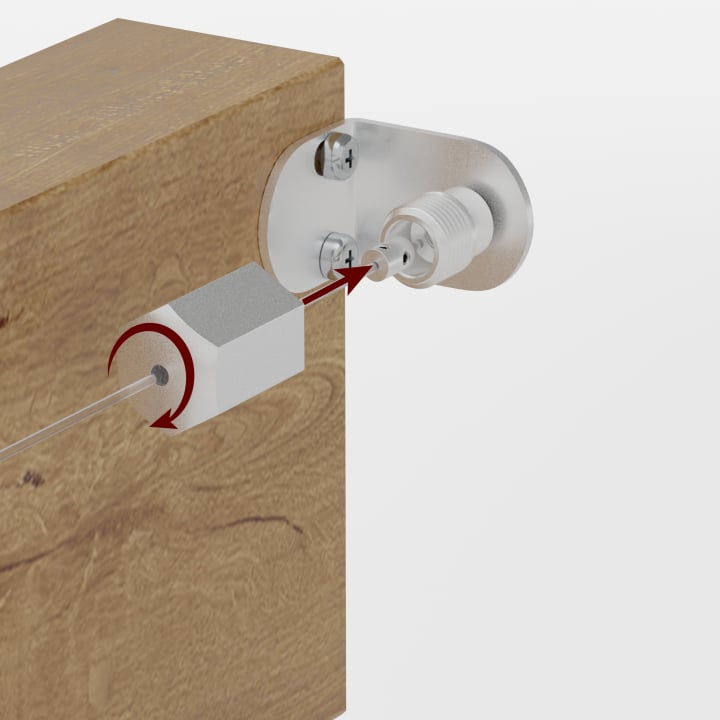
Close the tensioning element
Screw the tensioning element onto the threaded sleeve so that it encloses the stop element. The tensioning element pulls the tensioner together and gives the rope the tension it needs. Do not tighten it too far - the rope should be taut, but not deformed.
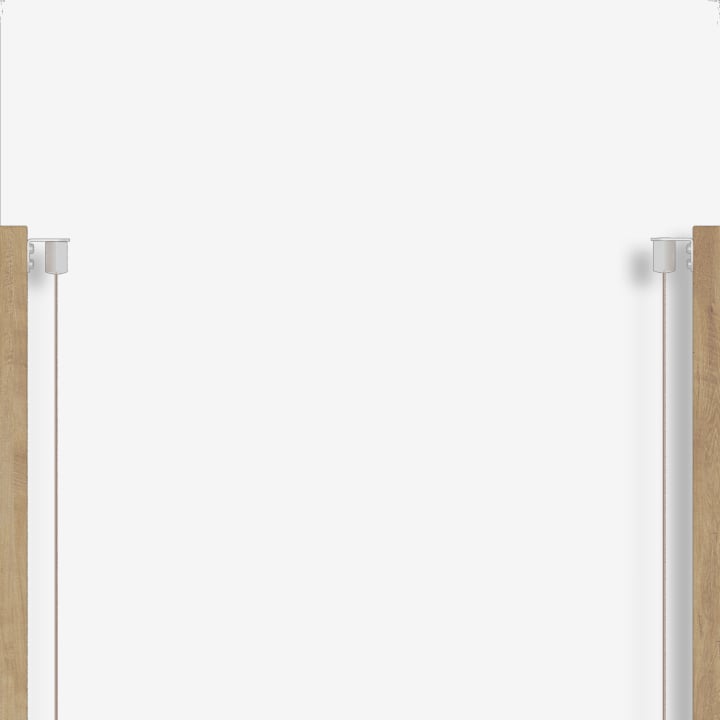
Repeat on the opposite side
Carry out steps 1 to 4 on the opposite rafter. Check that both ropes run parallel.
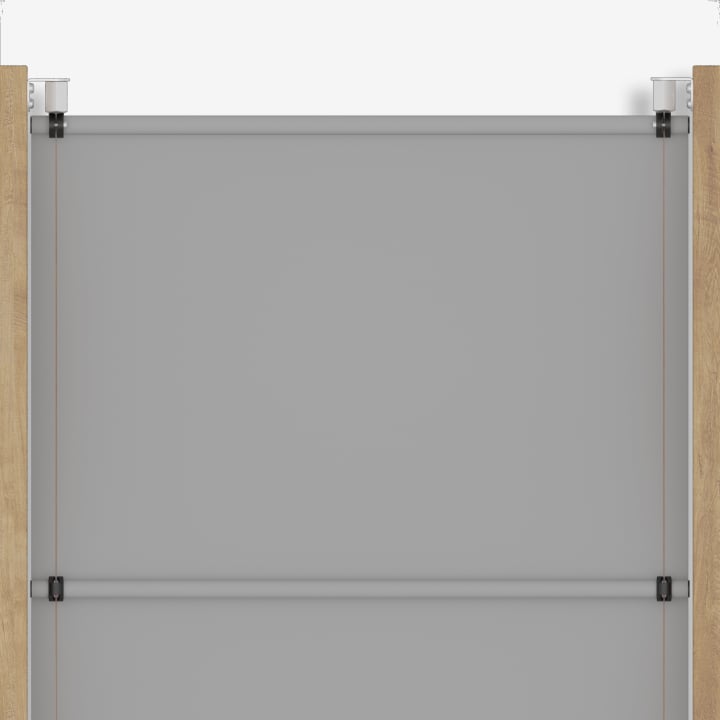
Hang the glides and mount the panels
Thread the required number of glides onto both ropes. Fix the stopper to the last aluminum tube. Clip the aluminum tubes into the glides and stoppers.
Stiff glides and stoppers - how to make it easier
Fabric-wrapped aluminum tubes are a tight fit in the glides and stoppers - that is intended, so nothing slips. If the resistance is too high: rub the spot on the glide or stopper with a bar of soap. Always start with the angled corner and then press in the straight side.
Put the glide or stopper into freshly boiled water for 5 minutes. The plastic becomes softer and slides onto the aluminum tubes far more easily. Once fitted, the material hardens again and sits firmly.
On a steeper slope - the cable tie trick
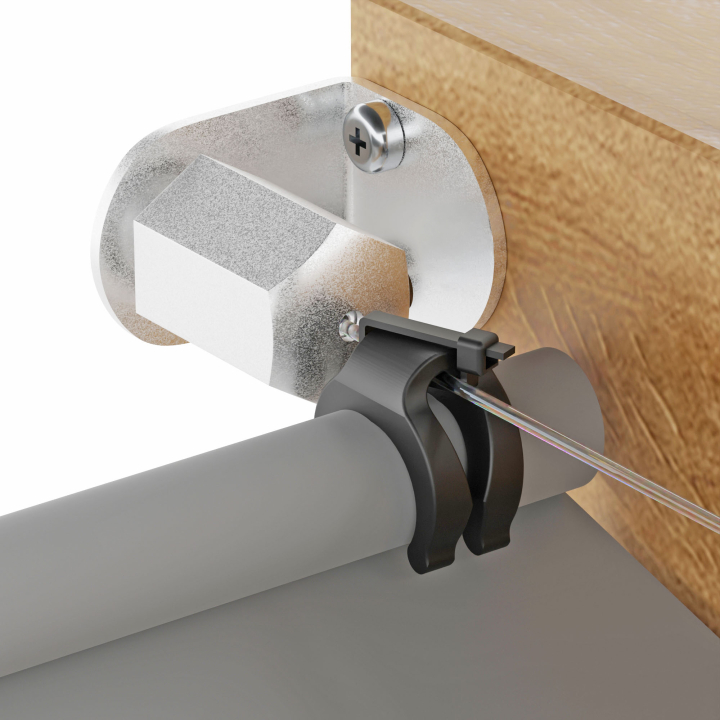
On steeply pitched roofs the shading panels can slide down on their own when the ropes follow the slope. A cable tie solves this: fix the last pair of glides (on the movable side with hanger and eye) lightly to the rope with a cable tie. Not too tight - the glide must not be fully fixed, but it should not slide freely either. Try it out and adjust the tension of the cable tie as needed.
- Identify the last pair of glides on the movable side
- Lay the cable tie loosely around glide and rope - the glide must still be able to move
- Tighten the cable tie until the glide meets noticeable resistance but is still movable
- Test it: push the panel back and forth by hand - there must be no strong jerking
Parts in detail
If you would like to read more about the individual parts:
Frequently Asked Questions
Sources
- Germes GmbH manufacture in Westoverledingen
- Material and part specifications for the cable tension awning
Last reviewed: 21.08.2026 · Reviewer: Germes-Team
Do you need help with the installation?
Our customer service answers your questions by phone or e-mail. Or configure your cable tension awning directly in the configurator, with the mounting kit that matches your roof structure.